Troubleshooting & Analysis
Thirty-five bucks. That's what the cashier-brain part of me did the math on the first time I went to reorder the official Keurig charcoal cartridges for my K-CLASSIC — a year's worth, at the rate the box tells you to swap them. Thirty-five dollars a year to put a thumb-sized lump of charcoal in my water tank. I stood there in the kitchen holding the empty old one thinking, this is a piece of plastic and some carbon, and they want luxury-candle money for it. So I did what I always end up doing. I bought the compatible ones instead — a multi-pack that worked out to a few dollars a cartridge — and I've been running them in this machine ever since.
Here's the honest version of how that's gone, because that's the only kind of review worth reading before you spend.
The price gap is the whole story (and it's bigger than you think)
The K-CLASSIC charcoal filter isn't a once-a-year part. You're supposed to replace it every two months. Do that math on the OEM cartridges and you're looking at roughly $30–$35 a year, every year, for as long as you own the machine. The compatible packs I switched to land somewhere around $12 for a multi-pack that covers most of a year. Same swap interval, same job, and I'm spending maybe a third of what the brand wants. Over the four-plus years a K-CLASSIC usually lasts, that's not coffee money anymore — that's a nice dinner out, just sitting in the difference between two nearly identical cartridges.
And they really are nearly identical. The compatible cartridge is the same little cylinder of activated charcoal in the same mesh housing, sized to drop into the same filter holder that came clipped inside your tank. Nobody reinvented anything here. You're paying the brand tax for the word "Keurig" stamped on the bag.
Does it actually fit? Yes — with one small ritual
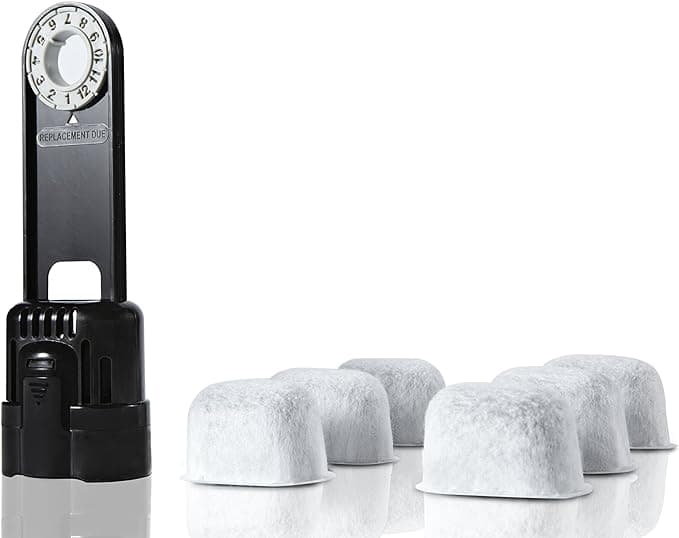
The install is the part people get nervous about, and I get it — you don't want to jam an off-brand part into a machine you paid real money for. But there's nothing to jam. The routine is the same as the official one: soak the cartridge in plain water for about five minutes first (this isn't optional — it wakes the charcoal up and knocks loose the carbon dust), then slot it into the filter holder, and drop the whole assembly back down into the water tank. It seats with that same soft little click when it's home. On my unit it sat flush the first time, no shaving, no forcing.
One thing I'll flag honestly: on a couple of cartridges from one batch, the fit in the holder was a hair looser than the genuine part. Not loose enough to rattle or float — it stayed put and did its job — but you can feel that the molding tolerance isn't quite as tight. If you skip the soak and just shove a dry one in, that's when people complain about it not seating right. Soak it. Five minutes. Then it behaves.
What it does well, and where it's a touch behind
The job of this filter is simple: pull chlorine taste and the general municipal-water funk out before it hits your grounds. On that, the compatible cartridge does what the OEM does. My tap water has a faint pool smell straight out of the faucet, and after the filter the coffee comes out clean — no chemical edge, none of that flat chlorinated note that makes a decent K-Cup taste like a hotel lobby. I've done the lazy man's blind test, brewing the same pod with a fresh compatible filter and then with a genuine one, and I genuinely could not tell them apart in the cup.
Where it's a touch behind: longevity at the very tail end. The official cartridge seems to hold its performance a little steadier in the last couple of weeks of its life. With the compatibles, I've noticed the water starts tasting a half-step less "polished" maybe a week before the two-month mark, especially if you're a heavy brewer like me. The fix is dumb and free — just swap it a few days early. At these prices you can afford to be generous with replacements, which honestly works in your favor anyway.
The real downsides — I'm not going to pretend there aren't any
First, the break-in smell. New compatible cartridges have a faint plastic-and-carbon smell for the first day or two. It's the housing off-gassing a little, and it does not end up in your coffee if you soak the thing properly and run a brew or two of plain water through before you trust it with a real cup. But the first time you open the bag, you'll notice it, and if you weren't expecting it you'd assume the worst. It clears.
Second, the packaging is cheap and the consistency batch-to-batch isn't OEM-perfect. The official cartridges come individually wrapped in that crisp branded packaging; the compatibles I buy show up bagged together, sometimes with a little loose carbon dust in the bottom of the pouch. Cosmetically it feels less premium. And as I mentioned, one cartridge in maybe a dozen has fit slightly loose. None of that affected the water — but if you're someone who needs every unit to feel machined-perfect, the OEM will scratch that itch and the compatible won't.
Third — and this is more a caution than a knock on the product — these are easy to forget about precisely because they're cheap. When you stop respecting the two-month schedule, that's when problems start. A saturated, neglected charcoal filter quits doing its job and just sits there as wet real estate, and hard-water scale starts creeping into the machine it was supposed to protect. Scale is the number-one thing that kills these brewers. The filter is your cheap insurance against an expensive death — so whichever brand you buy, set a reminder and actually change it.
Who should buy OEM instead — and who should grab these
If you're still under warranty and the paranoid part of your brain will blame any future hiccup on the off-brand part, buy the genuine cartridges and sleep easy. The calm it buys some people is worth the extra money to them, and I won't argue with that. Same goes if you run a K-CLASSIC in an office or rental where someone else's standards apply.
For everyone else — for me — the compatible charcoal filter is the easy call. It fits, it seats with the same click, it cleans the water indistinguishably in the cup, and it costs roughly a third of what the brand charges for the identical chore. The downsides are real but small: a two-day break-in smell, cheaper packaging, a slightly looser fit on the occasional unit, and a tail-end that fades a hair sooner. Stack that against the twenty-plus dollars I save every single year this machine keeps running, and it's not close. I bought the cheap ones, I've kept buying the cheap ones, and my coffee tastes exactly the way it should.


