Troubleshooting & Analysis
The brew that tasted like a swimming pool
It crept up on me. One morning my coffee just tasted… off. Flat, with this faint chemical edge underneath, like I'd rinsed the mug with pool water and not dried it. I blamed the beans. Bought a new bag. Same thing. Descaled the machine, ran four tanks of vinegar through it, still there. Then I popped the lid on the water tank and pulled the little charcoal filter cartridge out — the one I'd honestly forgotten existed — and the thing was gray-brown and slimy, packed solid. I'd been running it for what had to be six months past its date. That puck of saturated carbon was the whole problem. It wasn't filtering anything anymore; it was just sitting there marinating in my water tank, handing flavors back into every cup.
So that's the backstory on why I started caring about these. And once I started buying replacements, I went straight to the compatible charcoal cartridges instead of the Keurig-branded ones, because the math is a little ridiculous.
The price gap, plainly
A Keurig-branded 6-pack of these charcoal water filter cartridges runs about $16 most places — call it $2.65 a cartridge. The compatible packs I buy come 12 to a box for around $11, which is roughly $0.90 each. You swap these every two months, so that's six cartridges a year. OEM way: about $16 a year. Compatible way: about $5.40. It's not a fortune either direction — nobody's retiring on this — but you're paying three times as much for the brand name on a piece of activated carbon in a plastic mesh shell. Over the life of the machine that adds up, and the cheaper one does the identical job. I'll get to how I know that.
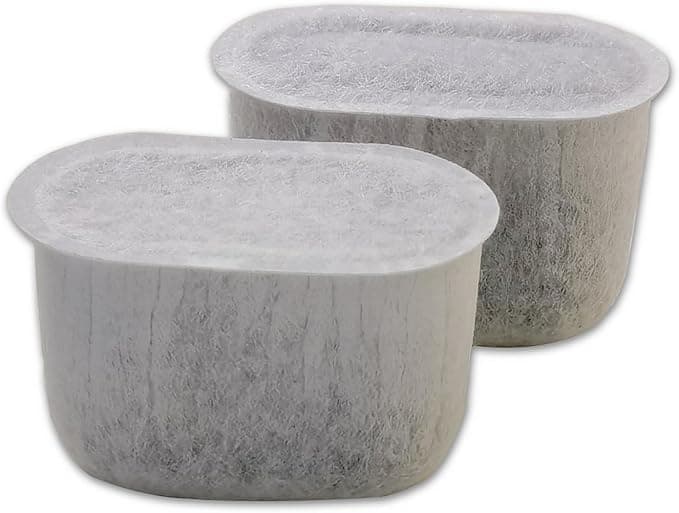
Does it actually fit?
This is the part people are nervous about, and fair enough. The cartridge clicks into a little two-piece holder that lives in the bottom of the water tank, and the holder is what slots onto the post inside the reservoir. The compatible ones I've used drop into that holder with zero fuss — same diameter, same little tabs, seats with the same soft click the original did. I've never had to force one or shave anything down.
The prep is dead simple and you do need to do it: soak the new cartridge in a cup of water for about five minutes before installing. This isn't optional fluff — dunking it wets the carbon and floats out the loose black dust that otherwise ends up as gritty specks in your first few brews. After the soak, press it into the holder, snap the holder onto the post in the tank, and you're done. The whole thing takes longer to read than to do.
How it performs next to the OEM
Honestly? I can't tell the two apart in the cup, and I've gone back and forth on the same machine. The job here is straightforward — pull chlorine and the off-tastes out of tap water before it hits the heating element. The compatible carbon does that. My coffee went back to tasting like coffee the morning after I swapped in the first one, same as it ever did with the branded filter. Water comes through clean, no aftertaste, no funk.
Where it matters more than flavor is scale. These cartridges aren't softeners — they won't strip out the minerals that build up limescale — but a working filter plus changing it on schedule keeps the gunk down, and scale buildup is the single most common way these machines die. A clogged, neglected filter (see: my pool-water saga) doesn't just ruin taste, it lets the reservoir turn into a little petri dish. Fresh carbon every two months is cheap insurance on a machine that costs real money to replace.
The downsides — and there are a couple
Let me be straight, because a review with only good things to say is worthless. First, the packaging is cheap. The branded ones come individually wrapped in a tidy little blister; the compatible 12-pack I get is a plain plastic bag with the cartridges loose inside, sometimes with a stray fleck of carbon dust rattling around. It works, it's just clearly the no-frills version. Nothing premium about opening it.
Second, and this is the real one: there's a faint plastic smell on a couple of the cartridges right out of the bag. Not all of them, but enough that I noticed. It's the mesh housing off-gassing a little. The five-minute soak knocks most of it out, and on the ones that smelled the strongest I just soaked them a bit longer — ten minutes instead of five — and ran one throwaway brew of plain water through the machine before making actual coffee. After that, gone. If you skip the soak entirely you might catch a whiff of it in your first cup, so don't skip it.
Third, quality across a 12-pack isn't perfectly uniform. One out of a dozen might have a slightly looser fit in the holder or a touch more loose carbon. It's never been bad enough to toss one, but the consistency cartridge-to-cartridge isn't quite as buttoned-up as the branded box. At three times fewer dollars, I've made my peace with that.
Who should just buy OEM
If you're the kind of person who's genuinely bothered by a plastic bag instead of individual wrappers, or you want the reassurance of the exact brand for a machine that's still under warranty and you're worried about voiding something — buy the Keurig ones. It's $16 a year, it won't hurt you, and the peace it buys is worth it for some people. No judgment.
What I actually do
I buy the compatible 12-pack, set a phone reminder for every two months because I will absolutely forget otherwise, soak each new cartridge for five minutes, and run one plain-water cycle before the first coffee. That routine has kept three different Keurigs in my house tasting right for a couple of years now, on filters that cost me about ninety cents apiece. The one time I let a filter go too long, the machine told me — loudly, in the cup — and the fix was a dollar and five minutes. After holding both kinds in my hand and drinking from both for months, the compatible cartridge does the same job for a third of the price, and I'd buy it again. I have. Several times.


