Troubleshooting & Analysis
I didn't believe a cheap filter could be fine either
I bought my first off-brand Keurig water filter cartridges out of pure spite. The Keurig-brand six-pack was sitting at around $20, and a no-name six-pack of the same little charcoal pucks was $10. Ten dollars. For something that gets soaked, shoved in a reservoir, and thrown out every two months. My brain went straight to: it's a scam, the cheap ones are going to taste like a swimming pool and gum up my machine. So I did the petty thing — I ordered the cheap pack just to prove they were garbage and feel smart about paying for the real ones.
They weren't garbage. That's the annoying part. I've now run third-party charcoal cartridges in my reservoir for the better part of two years, and I'm not going back to paying double.
The actual money, because that's why you're here
Here's the math that finally got me. A Keurig-branded cartridge pack runs about $20 for six. The compatible packs I keep buying run about $10 for the same six. You swap every two months, so that's six cartridges a year — one full pack. So the real-world difference is roughly $10 a year. Not life-changing on its own.
But stretch it. Over the life of a machine you'll keep five, six years, that's $50 to $60 you're handing over for the privilege of a brand name stamped on a disposable carbon disc. And if you've got two Keurigs in the house — one in the kitchen, one in the office, which is how I ended up here — you're now buying two packs a year and the gap doubles. I'd rather keep that money. Honestly, once I saw it laid out like that, the "real" cartridges started looking like the scam.
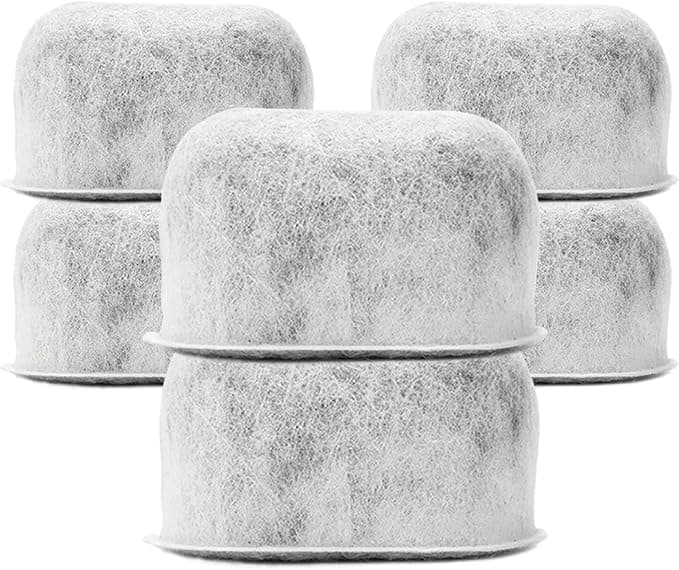
Do they actually fit?
This was my real worry, more than taste. A water filter that doesn't seat right is worse than no filter — it lets unfiltered water sneak around the edges and you think you're protected when you're not.
The install is the same routine as OEM, and the cartridges I've used follow it to the letter. You soak the new charcoal puck in a cup of water for about five minutes first — don't skip this, dry carbon floats and sheds dust into your first brew. Then it snaps into the little plastic filter holder, and the holder clips down into the bottom of the water tank. On mine there's a satisfying click when the holder seats, and the off-brand cartridges hit that click the same as the originals. The plastic frame on the holder is reusable — you're only ever replacing the cartridge itself — so fit really comes down to the puck diameter, and every compatible pack I've tried dropped in without forcing.
One honest note: the cartridges aren't always machined as cleanly as Keurig's. On a couple of them the seam was a hair rougher, a tiny bit of flash on the rim. It didn't affect the seat and it didn't matter once it was soaked and seated, but if you're the kind of person who inspects things, you'll notice the finish is cheaper. It's a $10 pack. It looks like a $10 pack.
How the coffee actually tastes
The whole job of this filter is to pull chlorine and the off-flavors out of your tap water before it ever hits the coffee. I live somewhere with aggressively chlorinated municipal water — straight from the tap it tastes like a public pool — and the cheap charcoal cartridges knock that down just as well as the branded ones did. Side by side, first cup of the morning, I genuinely can't tell which cartridge is in the tank. My wife can't either, and she's pickier about coffee than I am.
Where the compatible ones are a touch behind: longevity at the tail end. Around the seven-week mark, I feel like the off-brand carbon is a little more tired than Keurig's was at the same point — a faint return of that flat, chlorine-y edge if I've stretched it too long. The fix is just to actually respect the two-month interval instead of pushing it to ten weeks like I used to. Honestly that's good discipline anyway. I now swap on the first of every other month and the taste stays clean the whole way through.
The downside I want you to hear
The first two or three days of a brand-new cartridge, there can be a faint plasticky-carbon smell, and your first brew off a fresh puck can taste just slightly dull or papery if you didn't soak it long enough. This is the single most common thing people blame on "cheap filters," and it's almost always a skipped soak. Give it the full five minutes in water, run one throwaway reservoir of plain water through the machine before you brew coffee, and the smell's gone. I do a quick rinse-and-run every single time now and the problem just doesn't exist for me anymore.
The other real downside is packaging and consistency. Branded cartridges come individually wrapped and uniform. The budget packs sometimes come loose in one bag, and once in a while one puck in the pack feels slightly under-filled compared to its neighbors. Out of the dozens I've used I've had maybe one dud that felt light. For a $10 pack I can live with one weak unit out of six. If you can't, that's a fair reason to pay up.
Why you shouldn't just skip the filter
Quick reality check, because some people read "the cheap one is fine" as "so I'll run no filter at all." Don't. Scale buildup from hard, unfiltered water is the number one thing that kills these machines — it clogs the internal lines and the pump, and a clogged Keurig is a dead Keurig. A saturated, months-overdue cartridge is barely better than nothing; it stops adsorbing and just sits there. The filter is the cheap insurance on a machine that cost you a hundred-plus dollars. The only question worth arguing about is whether you pay $20 or $10 to do that job. Not whether to do it.
So who should buy which
If you've got soft water already, brew rarely, or you're the type who'll be genuinely bothered by one slightly imperfect cartridge in a bag — buy the Keurig-branded pack, sleep easy, it's only $10 more a year. No shame in it.
But for everybody else? I went in trying to prove the $10 pack was junk, and instead I proved myself wrong twice over. Same fit, same click, same taste in the cup, same protection for my machine — for half the price, every year, for as long as I own the thing. I've bought the cheap charcoal cartridges probably eight or nine times now, and I'll buy them again the next time my two-month reminder goes off. That's not a pitch. That's just what's in my reservoir right now.


