Troubleshooting & Analysis
Two little packs on the shelf, and I'm doing math in my head
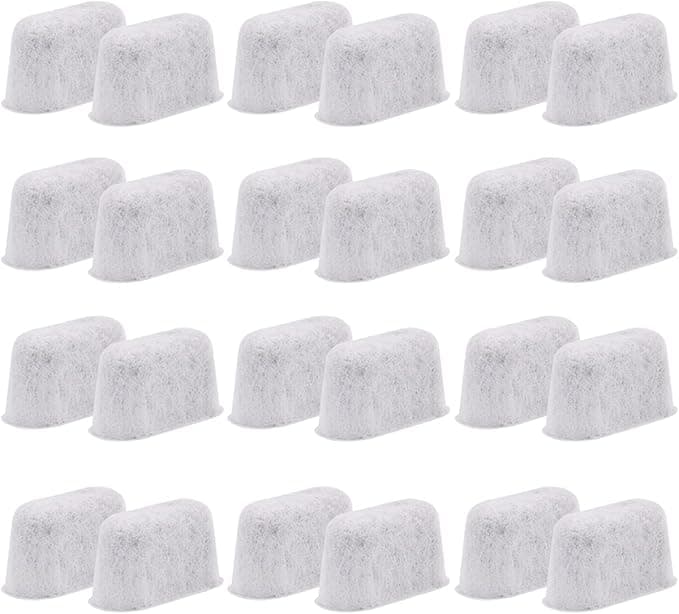
I was standing in the coffee aisle holding two filter refill packs for my Keurig — the one with the blue Keurig logo on it, and a generic compatible pack sitting right next to it for about half the price. Same charcoal cartridges, same little disc shape, same job: clean up the tap water before it hits the machine. The OEM six-pack was around $20. The compatible six-pack? Closer to $10. And I just stood there thinking, okay, what's the catch.
Because there's always supposed to be a catch with the cheap one, right? That's the story they want you to believe. I bought the compatible pack anyway — I'd been burned on OEM markup too many times to not at least try it. Here's what actually happened after a few months of running them in my reservoir.
The money, plainly
Let me get the numbers out of the way because that's why you're here. Keurig wants you replacing these charcoal water filters every two months. That's six cartridges a year. At roughly $20 for a six-pack of the genuine refills, you're looking at about twenty bucks a year just to keep clean-ish water running through the brewer.
The compatible pack I grabbed was around $10 for the same count. So we're talking a ten-dollar gap a year. Doesn't sound like a fortune — and it isn't, by itself. But the whole reason I started buying aftermarket in the first place is that ten dollars here, fifteen there, across a coffee maker and a fridge and an air purifier, adds up to real money for a product you're literally throwing in the trash every eight weeks. Paying double for a disposable charcoal puck never sat right with me.
Do they actually fit the holder?
This was my real worry, more than the price. A water filter that doesn't seat right is worse than no filter — it floats, it lets water bypass it, or it jams the little holder so the lid won't close. I've had that happen with a no-name fridge filter once and never forgot it.
These dropped into the Keurig filter holder without a fight. You soak the cartridge in water for about five minutes first — and honestly, don't skip that, the dry charcoal needs to saturate or you get a weird first cup. Then it clicks into the holder, the holder slides down into the water reservoir, and you're done. The disc diameter on the ones I bought matched the genuine holder snugly. Not loose, not so tight I had to force it. If I'm being picky, the plastic mesh housing on the compatible cartridge felt a hair flimsier in my fingers than the OEM — thinner plastic, you can tell — but once it's submerged in the tank doing its job, you never touch it or see it again. It's not a part you're judging on feel.
How the coffee actually tasted
Here's the honest performance read. My tap water isn't terrible but it's got that faint mineral edge, and unfiltered it makes coffee taste a little flat and chalky. With the compatible charcoal filter in the reservoir, that edge was gone. Cleaner cup, the coffee flavor came through brighter, same as it did with the genuine filter. I did a side-by-side over a couple weeks — switched back to an OEM cartridge for one tank, then back to compatible — and I genuinely could not taste a difference in the brew. If there's a gap there, my mouth couldn't find it.
Where I'll give OEM a slight nod: longevity confidence. Keurig's own cartridges, I trust the two-month interval on without thinking. With the compatible ones I noticed they seemed to feel a touch "spent" a little earlier — by week seven or so the water didn't taste quite as crisp as it did fresh. So I just swapped them a bit sooner, every six to seven weeks instead of riding the full eight. At ten bucks for six, swapping a little early doesn't hurt the math much. But it's a real thing, and I'd rather tell you than pretend.
The downsides, for real
I promised at least one honest knock, so here are a few. First, the plastic-y newness smell. Fresh out of the bag, before soaking, these had a faint chemical-plastic odor — more than the OEM did. The five-minute soak knocks most of it out, and I gave mine a quick extra rinse under the tap just to be safe. By the time it's in the tank and you've run a clean-water cycle through, it's gone. But if you skip the soak, your first cup or two might taste slightly off. So don't skip it.
Second, the packaging is cheap. Thin plastic sleeve, no fancy seal, a couple of mine were a little loose in the bag. Cosmetic, doesn't affect the filter, but it's the kind of thing that makes you second-guess at first glance. Third, the build quality variance — across the six cartridges, one or two felt very slightly different in firmness than the others. None failed, none leaked, but the consistency isn't quite as tight as the brand-name batch. That's the tradeoff you're accepting for the lower price.
Why bothering with the filter at all matters
Quick reality check, because some people skip the water filter entirely and just run straight tap. The charcoal isn't only about taste — it's knocking down the stuff that contributes to scale building up inside your Keurig. Mineral scale is the slow killer of these machines. It clogs the internal lines, the brewer starts pulsing weak and slow, and eventually it just quits. A two-dollar cartridge that helps keep that gunk out of a hundred-plus-dollar brewer is cheap insurance. Whether it's OEM or compatible, run the filter and replace it on schedule. A saturated, neglected charcoal puck does nothing — at that point you might as well have no filter, and you're letting that mineral edge right back into every cup.
So which one do I actually buy?
If you're someone who wants zero variables — you want the exact tested-by-Keurig cartridge and you don't want to think about swap intervals — buy the genuine refills and pay the twenty bucks. No shame in that, especially if it's one machine and the gap doesn't move your needle.
But me? I keep buying the compatible ones. Same clean taste in the cup, same easy drop-in fit in the holder, and I just swap them a week early to stay safe on freshness. For roughly $10 instead of $20 a year, doing a job I genuinely couldn't tell apart in a blind taste, it's an easy call. Soak it, seat it, run a rinse cycle, swap it every six to seven weeks. I've reordered these more than once — that's the most honest endorsement I can give anything.


