Troubleshooting & Analysis
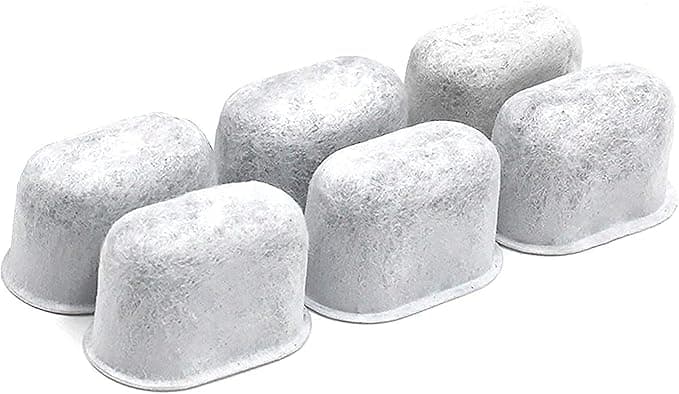
I stood in the coffee aisle with two little boxes in my hand and felt kind of stupid for hesitating. One was the Keurig-branded water filter refill pack. The other was a no-name charcoal cartridge that looked, honestly, identical — same chubby little puck, same mesh shell, same job. The only real difference I could see was the price tag and the logo. And yet I stood there for a solid minute doing the math in my head like it was a mortgage.
I've since bought the compatible ones for two years running, so let me just tell you how it actually went.
The price gap is smaller than you think — and that matters
Here's the thing nobody says out loud about Keurig water filters: they were never the expensive part. A genuine 6-pack of Keurig refill cartridges runs about $16, which works out to roughly $2.70 a filter. The compatible 12-packs I keep buying go for around $12 — about a dollar a filter. So you're saving maybe ten bucks a year, not fifty.
That changed how I think about this purchase. With a $40 fridge filter, the savings are the whole story. Here, they're not. What sold me on the compatible version wasn't the ten dollars — it was that the cheap price meant I'd actually replace it on schedule instead of squeezing six months out of a two-month filter because I felt cheap about it. A filter you actually swap beats a premium filter you forget.
Will it fit your machine? Almost certainly yes
This is the part people stress about, and it's the part that turned out to matter least. The Keurig water filter doesn't go anywhere near the brewing mechanism — it clips onto a little handle assembly that sits down in the water reservoir. That's it. Because it lives in the tank and not the guts of the machine, the same cartridge fits basically every Keurig with a removable reservoir: the Classic, K-Select, K-Elite, K-Duo, K-Cafe, the 2.0 models. If your Keurig has the filter holder, these work.
Install is genuinely a two-minute job, and the directions on the back are accurate. Soak the cartridge in water for about five minutes first — don't skip this, it's not optional fluff, it primes the carbon and knocks loose the dry dust. Then push it into the holder until it seats, snap the holder onto its handle, and stand the whole thing down into the reservoir. Done. I run mine and replace it about every two months, same as Keurig recommends, and I've never had one not fit.
Where it's a touch behind the real thing
Now the honest part, because a review where everything's perfect is a review you shouldn't trust.
The fit in the holder is a hair looser than the OEM cartridge. With the genuine one you get a confident little click. With the compatibles I've used, it seats fine but there's a tiny bit of play — it doesn't snap home with the same authority. Functionally it's never mattered; the cartridge isn't going anywhere once the holder's in the tank. But if you're the kind of person who notices that stuff, you'll notice it.
Second: the first rinse. The very first time I used a fresh compatible cartridge, the water that came through had a faint gray tint for the first cycle — carbon dust. Looked alarming for half a second. This is exactly why the soak step exists, and even with the soak I'd recommend running one throwaway tank of water through before you brew anything you plan to drink. After that first flush it runs clean. The OEM ones do this too, just a little less of it.
Third, and this is the one that actually bugs me: the packaging is cheap and the quality control is a notch less consistent. Out of a 12-pack I had one cartridge where the mesh shell felt slightly flimsier than its siblings. It still worked fine. But you can tell you're not paying for a polished product — you're paying for a functional one. If that bothers you, that's a real reason to go OEM.
And a faint thing: for the first day or two there's a very slight plastic-y smell to a brand-new cartridge before it's fully broken in. It fades fast. By day three I never think about it.
Why you shouldn't just skip the filter entirely
People ask me this more than anything: can't I just run the machine with no filter? You can. But the filter isn't there for fun. Its actual job is pulling chlorine and off-tastes out of your tap water so your coffee doesn't taste like the inside of a kettle — and, more importantly, cutting down what feeds scale buildup inside the machine. Scale is the thing that kills Keurigs. Mineral gunk slowly chokes the heater and the lines until one morning it brews half a cup and gurgles at you.
The filter doesn't replace descaling — you still need to descale every few months regardless — but it slows the buildup and it genuinely makes the coffee taste cleaner if your tap water is anything less than great. Mine isn't great, and the difference between filtered and unfiltered in my machine is real. A dead, saturated filter is almost worse than none, because it just sits there doing nothing while you assume you're protected. That's the case for the cheap ones again: replace them on time because they're cheap enough to not think twice.
Who should buy the OEM instead
If you're someone who wants the confident click, zero carbon dust on the first pour, and the reassurance of the matching logo — and ten dollars a year isn't on your radar — buy the genuine Keurig refills. No shame in it. The OEM cartridge is a slightly more polished version of the same thing, and "polished" is worth something to some people.
But me? I run a compatible charcoal cartridge in my Keurig, I soak it, I flush the first tank, I swap it every couple months, and my coffee tastes the same and my machine's still kicking after two years of this. For about a dollar a filter, doing the identical job the real one does, I'd buy them again. I have — twice now, and there's a third 12-pack in the cabinet waiting.
Soak it, flush it once, change it on time. Do those three things and the cheap one is just the smart one.


