Troubleshooting & Analysis
I figured a $12 box couldn't possibly do the same job. I was wrong.
I'll be honest with you. The first time I stood in my kitchen holding Keurig's own water filter refills in one hand and a no-name compatible box in the other, I assumed the cheap one was a trap. Same shape, sure. But charcoal is charcoal until it isn't, and I had this nagging feeling that the budget cartridge was just sawdust pressed into a plastic shell. I bought it anyway, mostly out of spite — Keurig wanted around $16 for a six-pack of refills and the compatible box gave me twelve cartridges for about $13. That's roughly $2.70 per filter versus a little over a dollar. If the cheap one was even close, the math wasn't close at all.
So I ran them. Side by side, two months at a time, in the same machine, with the same tap water that leaves a faint chalky film on everything in my town. Here's what actually happened.
The fit — where I expected the cheap one to fail first
This is usually where compatible parts give themselves away. A frame that's a hair off, a tab that won't clip, that moment where you're pressing harder than you should and praying nothing cracks. The Keurig charcoal cartridge sits inside the little holder that drops into your water reservoir, and the tolerances there aren't huge.
The compatible cartridge seated fine. Not "fine, I guess" — actually fine. You soak it in a cup of water for about five minutes first (don't skip this; a dry charcoal cartridge floats and traps air, and you'll get a sad trickle of bubbles instead of filtered water). Then it snaps into the lower half of the holder, the top clicks over it, and the whole assembly drops into the tank. The click was a touch softer than the OEM one. Slightly less satisfying. But it held, it didn't rattle loose, and it didn't leak around the seam. After four months of pulling the reservoir out to refill it almost daily, nothing loosened up.
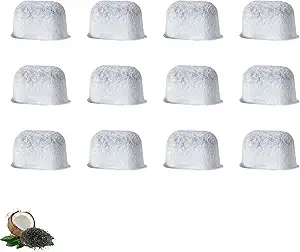
One small thing: the compatible cartridges in my box were a fraction shorter in the mesh section. Cosmetically noticeable if you line them up. Functionally? Couldn't tell the difference in the cup.
What the water and the coffee actually tasted like
Charcoal water filters in a Keurig aren't doing some dramatic purification. Their real job is knocking down chlorine taste and grabbing the loose junk in your tap water before it hits the heating element and your coffee. So the test is simple: does the coffee taste clean, and does the inside of the machine stay cleaner?
For the first three months, I genuinely could not pick the compatible cartridge out of a lineup by taste. The chlorine bite my tap water has in summer was gone. Coffee tasted round and clean, no metallic edge. My morning cup was my morning cup.
Where I'll give OEM a narrow edge: somewhere in week eight to nine, the compatible cartridge seemed to tire out a touch sooner. There was the faintest return of that flat, slightly-chlorine note near the very end of its run — a few days before the two-month replace mark. With the genuine cartridge I didn't notice that fade until I was past due for a swap. We're talking small. If I weren't actively hunting for a difference I'd probably have missed it. But you asked me to be straight, so there it is: the cheap one fades a little earlier at the tail end.
The real downsides — and there are a couple
First, the smell. New compatible cartridges had a faint plasticky, slightly carbon-dusty smell out of the bag for the first day. The five-minute soak handles most of it, and I rinsed mine under the tap for a few extra seconds, then ran one reservoir of water through and dumped it before brewing. After that, nothing. But if you skip the rinse-and-dump on day one, your first cup or two can taste vaguely of "new." That's not a defect so much as a "read the instructions" problem, but it's worth saying because the budget brands don't warn you well.
Second — and this is the one that actually matters — the packaging and quality control are cheaper, and you can feel it. Out of my twelve-pack, one cartridge had a slightly crushed mesh corner from being knocked around in shipping. It still worked, but I set it aside as my "use last" one. With Keurig's own refills, every cartridge in the box was uniform. So the trade-off is real: you're getting more filters for less money, and in exchange you accept that maybe one in a dozen won't be perfect. For me, at half the per-filter cost, a single dinged cartridge in a box of twelve is a trade I'll take every time.
Third, smaller gripe: the loose cartridges came in a plastic bag, not individually wrapped. Doesn't bother me. If you're the type who wants each one sealed, the OEM box does that.
Why I don't let this slide — the part people ignore
Here's the thing nobody likes to hear: the cartridge is the cheap part. The machine is not. Scale buildup from unfiltered hard water is the quiet killer of these brewers — it coats the heating element, clogs the needle, and eventually you get weak, half-filled cups and a machine that dies years early. A working charcoal filter doesn't descale for you, but it cuts down the gunk reaching the internals and keeps your coffee from tasting like the tap.
Which is exactly why running these on the two-month schedule matters more than which brand you buy. A genuine cartridge left in for six months is far worse than a compatible one swapped on time. A saturated filter doesn't just stop helping — it can become a little reservoir for the stuff it already trapped. Set a reminder. Two months. The cheaper the cartridges are, the easier it is to actually stay on schedule instead of stretching a $2.70 OEM filter to guilt-justify the cost.
So who should buy what
If you've got a high-end brewer you babysit, water that's perfect already, and you simply want the manufacturer's name on every part for warranty peace, buy Keurig's own refills. No argument from me. The consistency is real and you're not spending a fortune either way.
But for the rest of us — normal tap water, a brewer we use hard every morning, and zero interest in paying double for a strip of charcoal — the compatible cartridges did the same job. Cleaner water, cleaner coffee, a click that held, four months of daily abuse without a complaint. The frame's a hair less premium, the QC isn't flawless, and the cheap one fades a few days early at the very end. I know all that. And at roughly half the per-filter price, I'd buy them again. I already have — I'm three boxes deep.


