Troubleshooting & Analysis
Problem Identification: Common Symptoms & Root Causes
The Roborock vacuum robots are designed to simplify cleaning tasks, yet users often encounter issues that can lead to suboptimal performance. One of the most common problems reported is the robot leaving dirt behind, often accompanied by loud noises or error messages indicating that the 'bag is full.' These symptoms can be frustrating, especially when you rely on your robot to maintain a clean home.
The root causes of these issues can vary widely. Often, the main brush may become clogged with hair or debris, reducing its effectiveness at picking up dirt. Additionally, if the dust bin is not emptied regularly or if the bag is nearing its capacity, it can lead to the robot's inability to collect dirt efficiently. These problems can also create unnecessary strain on the motor, resulting in louder operation as the robot struggles to perform its tasks. Understanding these symptoms and their causes is the first step toward restoring your Roborock to its optimal performance.
Comprehensive Troubleshooting & Maintenance Guide
To address the issues of dirt left behind, loud noises, and the 'bag full' notification, follow this comprehensive troubleshooting and maintenance guide:
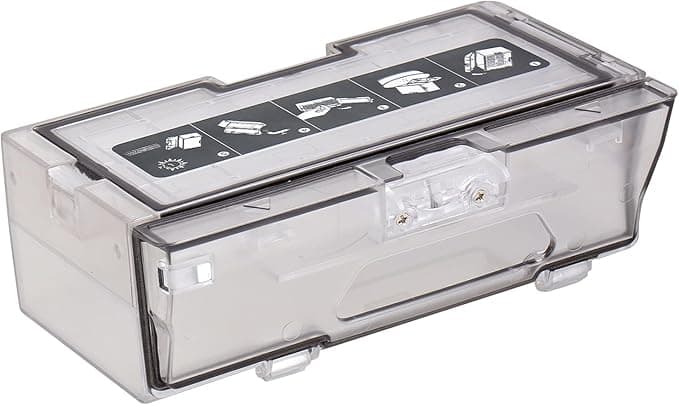
- Step 1: Inspect the Dust Bin
Start by removing the dust bin from the robot. Check for any visible blockages or debris. Empty the bin and clean it thoroughly with warm, soapy water. Ensure that the bin is completely dry before reinserting it into the robot.
- Step 2: Examine the Dust Bag
If your model uses a dust bag, check its status. If the bag is more than 70% full, replace it. This can prevent suction issues and ensure that the robot operates efficiently. Consider using a compatible or OEM replacement bag depending on your budget and preference.
- Step 3: Clean the Main Brush
Remove the main brush and inspect it for hair, debris, or damage. Use scissors to cut away any tangled hair and clean the brush thoroughly. If the brush is worn out or damaged, it should be replaced to maintain optimal performance.
- Step 4: Check the Side Brushes
Side brushes can often become misaligned or clogged with debris. Remove them and clean any buildup. If they appear worn or damaged, replace them to ensure full coverage during cleaning.
- Step 5: Run a Diagnostic Test
After performing the above maintenance steps, run a diagnostic test using the app associated with your Roborock. This will help you identify any remaining issues and confirm that the robot is functioning correctly.
Cost Analysis: Original vs. Compatible
When it comes to replacing parts for your Roborock, you have the option of choosing Original Equipment Manufacturer (OEM) parts or compatible generic kits. Understanding the financial implications of these choices is crucial for long-term maintenance.
| Part Type | Cost per Part | Estimated Annual Replacement Frequency | Total Annual Cost |
|---|---|---|---|
| OEM Main Brush | $25 | 2 | $50 |
| OEM Dust Bag | $15 | 6 | $90 |
| Generic Main Brush | $15 | 2 | $30 |
| Generic Dust Bag | $10 | 6 | $60 |
| Total OEM Cost | $140 | ||
| Total Generic Cost | $90 |
As illustrated in the table above, opting for compatible generic parts can save you $50 annually. While OEM parts are often perceived as more reliable, the savings from generic parts can be significant, especially for regular maintenance items like dust bags and brushes. The return on investment (ROI) can be substantial, making it an attractive option for budget-conscious consumers who still want to maintain their Roborock's performance.
Advanced Installation Pro-Tips & Best Practices
When replacing parts on your Roborock, following best practices can greatly enhance the installation process and prolong the life of your robot:
- Use the Right Tools: Ensure you have a small screwdriver set, scissors, and cleaning brushes on hand to make the replacement process easier and more efficient.
- Follow Manufacturer Guidelines: Always refer to the user manual for specific instructions regarding part replacement. This ensures that you’re following the correct procedures and using the right components.
- Keep a Maintenance Schedule: Establish a routine for checking and replacing parts every few months. This proactive approach can prevent larger issues from developing over time.
- Test After Installation: Once you’ve replaced a part, run a brief cleaning cycle to ensure everything is functioning correctly. Listen for any unusual noises and check for effective dirt pickup.
- Document Your Replacements: Keep a log of when you replace parts. This will help you keep track of the lifespan of each component and plan for future replacements.
Frequently Asked Questions
1. How often should I replace the dust bag in my Roborock?
The frequency of dust bag replacement largely depends on usage and the amount of debris in your home. However, a general rule of thumb is to replace the dust bag when it reaches 70% capacity, which typically occurs every 1-2 months for average households. Regularly checking the bag will help maintain optimal suction and performance.
2. Can I use non-OEM parts without voiding the warranty?
Using non-OEM parts can be a gray area concerning warranty coverage. Generally, if a non-OEM part causes damage to the device, the warranty may be voided. However, if the non-OEM part does not affect the integrity of the robot, it may still be covered. Always check your warranty terms and conditions before making a purchase.
3. What should I do if my Roborock still leaves dirt behind after replacing parts?
If your Roborock continues to leave dirt behind after you've replaced the main brush and emptied the dust bag, consider checking other components such as the filtration system or the wheels. Blocked air filters can reduce suction power, and wheels that are not functioning properly can hinder movement. Additionally, ensure that your robot's sensors are clean and unobstructed.
4. Is it worth investing in OEM parts over generic options?
This decision is subjective and largely depends on your priorities. OEM parts generally offer better reliability and performance, but for many users, the cost savings of generic options can outweigh the benefits of OEM. If you prioritize cost-effectiveness and are willing to compromise slightly on performance, generic parts can be a viable solution.
5. How can I prevent clogs in the main brush?
To minimize the occurrence of clogs in the main brush, regularly clean it after each use, especially in homes with pets. Consider using a hair removal tool designed specifically for vacuum brushes to ensure efficient cleaning. Additionally, ensure that the brush is correctly inserted and securely fastened to prevent it from becoming loose during operation, which can also lead to clogs.


