Troubleshooting & Analysis
I didn't believe a $20 set of brush heads could be fine either. I'd been a good little Philips customer for years — buying the official heads off the rack, wincing at the receipt, telling myself the gum health was worth it. So when I first saw a compatible 8-pack going for about the price of two genuine heads, my gut reaction was the same one you're probably having right now: that's too cheap, something's wrong with it, it's going to feel like brushing with a dollar-store toothbrush stuck on a fancy handle. I ordered a pack mostly to prove myself right.
I was wrong. Mostly. Let me walk you through it honestly, downsides and all, because that's the only way this is useful to you.
The price math that cracked my brand loyalty
Here's the thing that finally got me. Genuine replacement heads for the Philips G3 run real money per head at standard retail — and you swap every three months, so that's four heads a year, every year, forever. The compatible set I bought was an 8-pack for roughly what two original heads cost. Do that arithmetic for a second. Two heads versus eight, same outlay. That's not a discount you talk yourself into — that's a two-year supply against a half-year supply.
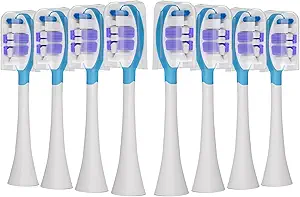
And these aren't no-name fiber. The pack I got runs genuine DuPont bristles, which matters more than the marketing makes it sound — DuPont nylon is the same family of filament the big brands use, so the part that actually touches your teeth isn't where they cut the corner. We'll get to where they did.
Fit and install: does it actually click on?
This was my biggest worry. A head that wobbles or sits a hair off the shaft is worse than useless — it rattles, loses power transfer, and feels gross in your mouth. The Philips coupling is a simple press-fit, which is good news for aftermarket parts because there's not much to get wrong.
The routine is exactly what you'd expect: pull the old head straight off the metal shaft — firm tug, no twisting — rinse the shaft under warm water to clear the old gunk (and there's always gunk down there, a little horrifying the first time), then push the new head on until it clicks home. On my unit it seated with a clean, definite click and zero side-to-side play. No fiddling, no forcing.
I'll be straight on one thing, though. Across the 8-pack the fit wasn't perfectly identical head to head. Most clicked on tight as the original. One or two went on with a slightly looser feel — not loose enough to rattle or fly off, but I could tell the molding tolerance is a touch wider than Philips holds. Hasn't caused a problem in months of use. But if you're the kind of person who notices that, you'll notice it.
How it actually cleans
I ran one of these heads as my daily driver for a full three-month cycle before writing this, because a week tells you nothing. Day to day, my teeth feel the same as they did on the genuine head — that squeaky, just-left-the-dentist feeling on the front teeth, the bristles getting into the gumline without me having to scrub. The DuPont bristles held their shape; they hadn't splayed into that sad flattened fan by the end of three months, which is the real test of cheap fiber. Bad bristles flare early and stop reaching anything.
Where's it a touch behind? Two small places. The genuine heads have those colored indicator tufts that fade as a wear reminder — on the compatibles the dye fades unevenly, so you're back to counting to three months yourself. And the very back molars, where you want a precise tip, felt a hair less surgical than the official head. Marginal. But I noticed.
The real downsides, said plainly
I promised you honest negatives, so here are the ones that are true. The packaging is cheap — thin blister plastic, no individual sleeves, and a couple of the heads had a faint plastic smell straight out of the wrapper. I ran the first one under hot water for thirty seconds before its first use and the smell was gone, but it's there on day one and it'll bug you if you're sensitive to that.
The bigger honest point is consistency. With genuine heads, every single one is identical. With an 8-pack of compatibles, you're accepting that one might fit a touch looser, one might have a stray bristle, one might smell faintly of the factory. None of mine were defective. But "none defective across eight" is a different promise than "every one perfect," and you should buy knowing that. If a perfectly uniform, indicator-tufted, name-on-the-box experience is what lets you sleep, the OEM head is genuinely what you want, and I won't talk you out of it.
Why none of this is casual
Here's the part people skip, and it's the part that actually matters for your mouth. The reason you replace these every three months isn't a gimmick. Worn, splayed bristles stop reaching the gumline and start dragging along it — dentists will tell you flat-out that frayed bristles damage gum tissue and leave plaque sitting where you can't see it. And a head you've kept too long is a damp, warm, bacteria-friendly little object you put in your mouth twice a day. The real danger isn't the compatible head — it's the head you've stretched to eight months because replacements felt too expensive.
That's the quiet case for the cheap pack, honestly. When eight heads cost what two used to, you actually swap on schedule. The genuine-head buyer who nurses a worn head to five months to save money is doing worse for their gums than the person paying a fifth of the price and changing it right on time.
The verdict
Buy the genuine heads if absolute uniformity is worth the premium to you, or if you've had a specific bad experience with aftermarket fit and just don't want the small variance. That's a legitimate reason and I respect it.
But for me? I went in trying to prove the cheap pack was junk, and three months later I'm on my second head from the same set with no regrets. Same DuPont bristles, same clean click, same squeaky-teeth result — at roughly a quarter of the per-head cost, which is the difference between dreading the swap and just doing it. I'd buy it again. I already have.


