Troubleshooting & Analysis
I did the math at the drugstore and almost put my whole basket back
A four-pack of genuine Philips Sonicare heads was sitting on the shelf at $44. Forty-four dollars. For four little plastic clip-on brushes that I'm supposed to throw away every three months. Do that math out loud: a year of real heads is basically $44, give or take, and that's if you stretch each one a little past where the dentist wants you to. Meanwhile, taped to my phone was the listing I'd been eyeballing — an eight-pack of compatible heads for the PHILIPS-B0FT7LYJ4W, roughly $20. Eight. For the price of not even two originals.
I stood there doing the kind of dumb arithmetic everyone does in that aisle. Two years of brushing covered for twenty bucks, versus one year for forty-four. That's a $68-ish gap over two years if you're keeping count, and I was. So I bought the cheap ones, half-expecting to write a smug little "you get what you pay for" review. That's not how it went.
Here's the part nobody tells you about the clip
The thing I was most nervous about wasn't the bristles. It was the fit. Sonicare's whole pitch is that snap — the head seats onto the metal shaft and there's this satisfying little click, and if a knockoff doesn't grip that shaft right, it rattles, it leaks water down into the handle, it feels like a toy. I've had a cheap head from years ago that wobbled a hair when I pressed it against a molar, and that wobble lives in my head rent-free.
So I pulled the old head straight off, rinsed the shaft under warm water like I always do, and pushed the new one on. It clicked. Genuinely clicked — same resistance, same little stop at the end. I grabbed the head and tried to wiggle it side to side and it didn't budge. Over four months of twice-a-day use I never once got water creeping into the handle joint, which is the failure I was actually scared of. If anything the internal collar on these grips the shaft a touch tighter than my last OEM head did, to the point where the first removal took a real tug.
The bristles, honestly
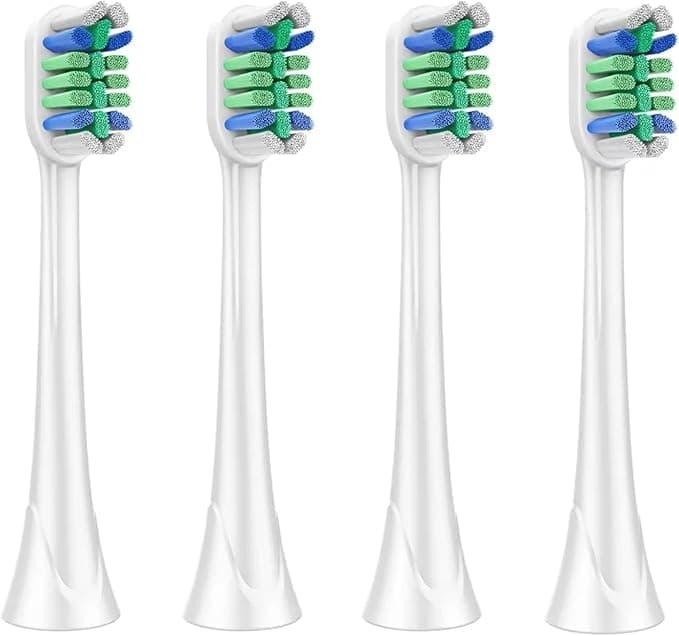
The listing makes a point of the DuPont bristles, and look — I can't put these under a microscope and prove the filament is identical to what Philips spools onto their factory line. What I can tell you is what my mouth felt like. That squeaky, just-left-the-dentist feeling on the front teeth? There. The little blue indicator bristles that fade to white when the head's worn out? Present, and they faded on roughly the same schedule — noticeably lighter right around the 11-to-12 week mark, which lines up with the replace-every-3-months rule I try to actually follow now.
Plaque-wise, my checkup was clean. No new trouble spots, no "you've been slacking back here" from the hygienist. That's the bar for me. A brush head's job isn't to be a luxury good, it's to drag soft bristles and a little vibration across enamel and gumline twice a day. These do that.
Now the downsides, because there are some
First one's small but real: the first head out of the pack had a faint plastic smell. Not chemical-scary, just that fresh-injection-molded smell you get from anything cheap and new. I ran it under hot water, brushed once without paste to break it in, and by day two it was gone. But if you're sensitive to that, you'll notice it the first morning.
Second, and this is the one I'd actually weigh: the bristle trim isn't quite as crisp as Philips' own. On a genuine head the bristles are cut into this neat little dome with the contoured center tuft, and it's tidy. On a couple of these compatible heads, a few outer filaments stuck out a millimeter long, slightly uneven, like they didn't get the final trim pass. Did it hurt anything? No. After a week of use everything settled into the same worn shape. But out of the box, one of my eight heads looked a little scruffy, and if you're the type who needs everything perfect, that'll bug you.
Third: the packaging is nothing. Eight heads in a thin blister tray, no individual hygienic caps like the premium Philips multipacks sometimes include. If you travel and you want each spare head sealed, these aren't that. I keep mine in a drawer in a clean ziplock and it's a non-issue, but I'm telling you what you're not getting.
One more usage note I didn't expect: across eight heads, the color-fade indicator on two of them was a little inconsistent — one faded a touch early, one a touch late. So I stopped trusting the color completely and just went by the calendar. Pull the old head straight off, rinse the shaft, push the new one on till it clicks, mark the date. Treat three months as the hard limit no matter what the bristles look like.
Why I won't push a worn head past its date — cheap or not
This matters more with a $20 eight-pack than people think, because the temptation when heads are cheap is the opposite of what you'd expect. You'd assume cheap means you swap them more often. In practice I've watched friends hoard the expensive ones and ride a flattened, splayed-out head for six months because tossing a $11 brush feels wasteful. That's the actual danger. Splayed bristles stop reaching the gumline, they just smear plaque around instead of lifting it, and a brush head that's been damp in a bathroom for half a year is a genuine little bacteria farm. Frayed bristles can also start scrubbing at your gums instead of cleaning them, and receding gums don't grow back. The whole point of the cheap multipack is that you have zero excuse not to swap on schedule. Use that.
So who should still buy the Philips originals?
If you've got sensitive gums that flare at the slightest thing, or you've had real dental work — implants, a lot of crown margins — and your dentist specifically told you to stick with the genuine head, do that. The five-dollars-a-month difference is not worth second-guessing professional advice. Same if that one slightly-uneven head out of the box would genuinely drive you up a wall every morning.
For everyone else with a standard Sonicare-style handle and normal teeth? I've now been on these compatible heads for the better part of a year. Same click, same clean-teeth feeling, same fade indicator, a clean checkup to back it up — at a hair under $20 for eight instead of $44 for four. I bought a second pack before the first ran out. That's the most honest endorsement I've got: I voted with my own money, twice.


