Troubleshooting & Analysis
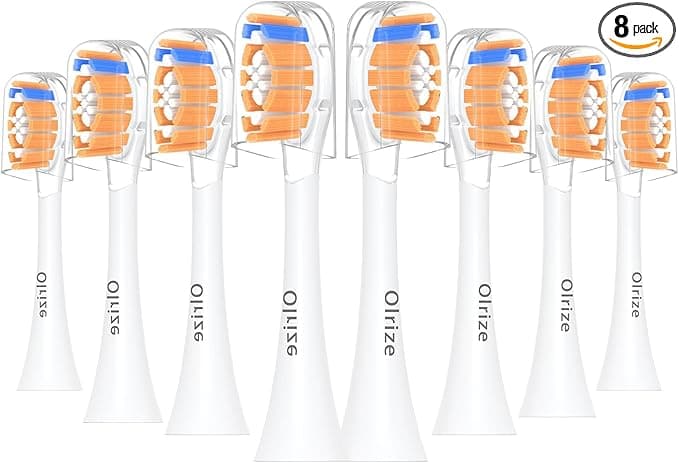
I didn't believe a $20 box of eight could be fine either
Here's where my head was at. I'd been paying for genuine Philips Sonicare heads for years — eleven, twelve bucks a pop, sometimes more when the multipack wasn't on sale — and the whole time I had this nagging suspicion I was getting fleeced. So when I finally saw a compatible 8-pack land at around $22, my first thought wasn't "great deal." It was "what's the catch." Twenty-two dollars for eight heads, when two real ones cost me about the same? That math felt like a trap. Cheap bristles that go flat in a week. Loose fit that rattles on the shaft. Something.
I bought a pack anyway, mostly to prove myself right. I was wrong. Mostly.
The price gap is genuinely absurd
Let me lay it out the way I actually worked it through at the kitchen table. A genuine Philips head runs me roughly $11 each. I'm supposed to swap every three months, so that's four a year — call it $44 annually just to keep one brush honest. The compatible 8-pack I grabbed was about $22 for eight heads. That's two full years of replacements for less than the price of four originals. Put another way, each compatible head landed at under three dollars where the OEM wanted eleven.
When the spread is that wide, you stop asking "is the cheap one worth it" and start asking "what would the expensive one have to do to justify a 4x premium." And after a few months of brushing with these, I couldn't find the answer.
Fit: the part I was most worried about, and least disappointed by
This was my real fear. A toothbrush head that doesn't seat right is worse than useless — it wobbles, it leaks vibration, and you spend the whole two minutes feeling like it's about to fly off. The install is dead simple, same as the genuine ones: you pull the old head straight off the metal shaft (it takes a firm tug the first time), rinse the shaft under warm water, and push the new one down until it clicks. That click matters. On the real Philips heads there's a clean, confident snap. On these compatible heads the click is there too — just a hair softer, a little less crisp.
Once it's on, though, it's on. No wobble, no rattle, no creeping-up-the-shaft over time. I've now run several of these through full three-month cycles and not one has worked itself loose. The fit is the thing I was bracing to complain about, and it's the thing I have the least to say about. It just works.
How it actually cleans
The pitch is Dupont bristles — the same bristle stock the name brands use — and honestly, in the mouth, I can't tell the difference during the brush. Same buzz, same coverage, same that-just-came-from-the-dentist smoothness when I run my tongue across my teeth afterward. My hygienist didn't flag anything at my last cleaning, and she is not shy about telling me when I've been slacking.
Where I'll be straight with you: the bristles soften a touch faster than the genuine heads. Not dramatically. But around the ten-week mark I notice the splay starting a little sooner than I remember from the real ones, which tended to hold their shape right up to the swap. Here's the thing, though — you're supposed to replace every three months regardless, because worn bristles stop clearing plaque and the head turns into a bacteria motel either way. So the heads aging slightly faster only matters if you were planning to push a head well past its expiration date, which you shouldn't do with any brand.
The downsides — and there are real ones
I promised myself I'd find the catch, so let me give you the honest list.
First, the packaging is cheap. Eight heads come in a thin plastic blister tray that feels like an afterthought, no individual hygiene caps like the premium packs sometimes include. Doesn't affect the brushing, but if you were hoping for something that felt premium on the shelf, this isn't it. It feels like exactly what it is — a no-frills bulk pack.
Second, that first-day plastic smell. New head, fresh out of the tray, there's a faint plasticky note for the first day or two — most noticeable when you first wet it. It fades fast and I never tasted it while brushing, but it's there, and I'd rather tell you than have you think your nose is lying.
Third — and this is the one to actually weigh — color coding. The genuine heads come with those little colored rings so a household can tell whose head is whose. These compatible packs are usually all one color. If you share a charger base with a partner or kids, you'll need your own system, like a dab of nail polish on the handle. Small thing. Annoying enough that I'm naming it.
And to be fair about consistency: across a pack of eight, I had one head whose click felt looser than the rest on first install. It still seated fine and never came off, but the tolerances aren't as uniform pack-to-pack as the OEM stuff. At under three bucks a head, I can live with one being slightly off.
Why I don't cheap out past the three-month mark
One more thing, because it's the actual reason any of this matters. The temptation with a bulk pack is to ration it — stretch each head to four or five months because hey, you've got eight of them. Don't. Worn, splayed bristles don't just clean worse; they can scrape and irritate your gums while leaving the plaque behind, which is the worst of both worlds. The reason to buy the cheap multipack isn't to brush with old heads longer. It's so that replacing on schedule stops feeling like you're flushing money. At three dollars a head, I swap on time without a second thought. At eleven, I used to stall.
So who should skip these
If you genuinely can't accept any variation — you want every head identical, the crispest possible click, the colored rings, the branded box — buy the genuine Philips heads and pay the $44 a year. No shame in it. Same if you've got sensitive gums and your dentist has you on a specific recommended head; stick with what they told you.
For everyone else — and that's most of us — I came in trying to catch these out and walked away restocking. They fit, they clean as well as I can perceive, and they cost a quarter of what I was paying. The downsides are real but small: cheap tray, a day of plastic smell, no color rings. For roughly twenty bucks instead of forty-four a year, doing the same job in my mouth, I'd buy them again. I have, twice now.


