Troubleshooting & Analysis
The first thing I noticed wasn't the air. It was the click. When you seat a fresh filter into a Philips G2, there's this specific little snick when the frame drops into its channel and the latch catches — and the compatible one I'd just unboxed gave me that exact sound on the second try. The first try, honestly, it sat a hair proud and I had to push the top corner down. But the click came. And once I heard it, most of my nervousness went away, because that click is the machine telling you the seal is real.
I'll back up. I bought my G2 a couple years ago for a stuffy upstairs bedroom that smells like whatever the dog tracked in. When the filter light finally came on, I went to replace it and got hit with the usual sticker shock — the Philips-branded True HEPA replacement was sitting at around $49, and you're supposed to swap it roughly once a year if you run the thing daily like I do. That's a real annual cost stapled onto a unit I already paid for. The compatible H13 I ended up testing was $24. Same job, half the money, and I'd be lying if I said the gap didn't make me suspicious instead of excited. Cheap filters are exactly the kind of thing that sounds great until your bedroom smells like burnt plastic at 2 a.m.
So I just ran it. Four months, every night.
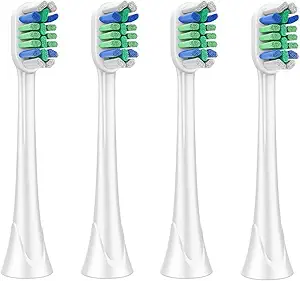
Here's what the cheaper filter actually is, because the spec matters: it's a True HEPA H13 media, which is the same efficiency class Philips puts in the genuine cartridge. H13 captures down to the fine stuff — the 0.3-micron particles, the pollen, the dander my dog sheds like it's a hobby. On paper it's a match. The question was never the rating on the box. It was whether the thing in my hand lived up to it once it was sealed inside a real machine breathing real air.
Install was four steps and I'm not going to pretend it's hard. Unplug the unit — actually do this, don't be the person who resets the filter light with it running. Pop the old filter out. Slide the new HEPA in. Hold the reset until the light clears. The whole thing took me under two minutes the second time around, and the only fiddly part was that frame-fit I mentioned. The compatible frame is molded a touch looser than the OEM, so it doesn't drop in with that buttery first-try glide the Philips one has. You guide it. Push the high corner. Then it's home and it's solid — no rattle, no whistle of air sneaking around the edge, which is the thing that would actually matter for performance.
Where it's genuinely as good
Air quality, day to day, I could not tell you which filter was in the machine if you blindfolded me. My G2 has the little particle readout and the color ring, and the time-to-clear after I, say, sear something in the kitchen and the smoke drifts upstairs — that was the same. Maybe a beat slower one time, but I was watching for it, which is its own kind of bias. Overnight in a closed room it pulled the air down to that clean, slightly nothing smell by morning the same way the real one did. Four months in, it's still doing it. The break-in week is real though, and that brings me to the honest part.
The downsides — and there are a few
First, the smell. For the first two, maybe three days, there's a faint plastic-and-new-cardboard odor coming off it on the higher fan speeds. It's the media and the frame off-gassing, it's mild, and it was completely gone by day four — but if you've got a sensitive nose or you're putting this in a nursery, run it on high with a window cracked for a day before you trust it. I noticed it most the first night and almost convinced myself the whole thing was a mistake. It wasn't. It just needed to breathe out.
Second, the build quality you can see and feel is cheaper. The packaging is thin — mine arrived in a plain box with a bag, no fancy molded insert — and the plastic frame flexes a little more than the OEM when you handle it. It doesn't matter once it's seated, but it does tell you where the $25 savings came from. They didn't reinvent HEPA media for cheap; they cut the corners you don't breathe through.
Third, and this is the one I'd actually weigh: lifespan consistency. The OEM cartridge feels engineered to hit its rated interval on the nose. With the compatible, I'd watch the filter light and my own nose rather than trusting the calendar blindly. Mine's still going strong at four months, but I plan to check it at month nine instead of assuming twelve. That's not a dealbreaker — it's just the homework that comes with saving the money.
Why none of this is the kind of corner you skip
Here's the part I won't soft-pedal, because it's the whole reason filters exist. A saturated, past-its-life HEPA filter doesn't just stop cleaning — it flips on you. All that trapped pollen, dust, and worst of all moisture-loving gunk becomes a little farm, and a damp, clogged filter can grow mold that the fan then blows back into the room you sleep in. Your G2 goes from cleaning the air to seasoning it. That's true of the OEM filter and the compatible one equally — the rating doesn't save you if the thing is six months overdue. So whichever you buy, the discipline is the same: change it when it's tired. The cheaper price actually helps here, because at $24 a swap you're less tempted to nurse a dead filter for another season to dodge a $49 hit.
Who should buy OEM instead
I'll be straight: if you've got a real respiratory condition, an immune issue, or a newborn in the room, and the genuine Philips cartridge's tighter quality control buys you something you can sleep on — buy the OEM. The $25 you save is not worth second-guessing the air around someone fragile. Same if you just hate fiddling and want the first-try perfect fit every single time.
But for me — healthy adult, dog, dusty upstairs room, daily use — I ran the compatible H13 for four months, it cleared the air the same, it survived a sear-the-steak smoke test, and it cost half. The looser frame and the three-day plastic smell are the price of admission, and they're small. I'd buy it again. I already have — there's a second one in the closet waiting for the next time that filter light comes on.


