
Troubleshooting & Analysis
Identifying Common Air Quality Problems
Are you experiencing issues with your Philips air purifier, specifically the model PHILIPS-C2-B0CWRVDJWN? If your red light stays on, you're noticing dusty air in your living space, or your device is suddenly louder than usual, you're not alone. These symptoms can be frustrating, especially when you rely on your air purifier for clean and healthy air. Let's dive deeper into these common problems and explore effective solutions.
Troubleshooting Guide: Fixing Common Issues
To address the issues you've encountered with your Philips air purifier, follow these troubleshooting steps:
- Red Light Won't Turn Off: This typically indicates that the filter needs replacement or has not been reset after changing it. To manually reset the filter indicator light, locate the reset button on the device. Hold it down for about 3 seconds until the light turns off.
- Dusty Air: If you’re noticing dust or allergens in the air, it may be time to check your filters. A clogged filter can lead to poor air quality. Replace the filter if it appears dirty or is past its lifespan.
- Increased Noise: A sudden increase in noise can signify that the fan is working harder due to a dirty filter or obstruction. Inspect the unit for any blockages and clean or replace the filter as necessary.
Cost Analysis: Original Brand vs. Compatible Replacement
When it comes to maintaining your air purifier, the cost of replacement filters can add up over time. Below is a comparison table that highlights the 1-year costs of the original Philips filters versus a high-quality compatible replacement:
| Filter Type | Cost per Filter | Filters Needed per Year | Total Annual Cost |
|---|---|---|---|
| Original Philips Filter | $50 | 2 | $100 |
| Compatible Replacement Filter | $30 | 2 | $60 |
As you can see, opting for a compatible replacement filter can save you $40 annually, all while ensuring your air purifier operates efficiently. This cost-effective option allows you to maintain air quality without straining your budget.
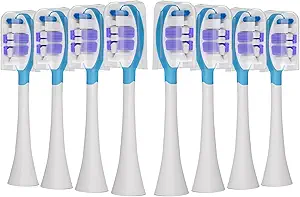
Installation Pro-Tips for Your Replacement Filter
Installing your new filter might seem straightforward, but a few tips can enhance your experience and ensure optimal performance:
- Flush the Filter: Before installation, running the filter under water for about 3 minutes can help remove any manufacturing dust.
- Align Properly: Make sure to align the filter tabs with the corresponding slots in the unit. This will ensure a snug fit.
- Listen for the Snap: When inserting the new filter, press until you hear a snap. This sound indicates that the filter is secured in place.
- Reset the Device: After installation, don’t forget to reset the filter indicator light as mentioned earlier to avoid confusion.
Frequently Asked Questions
Will using a compatible filter void my warranty?
Generally, using compatible filters does not void your warranty, but it’s always a good idea to check the warranty terms. Most manufacturers allow for third-party products as long as they meet specific standards.
How long does a compatible filter last?
A high-quality compatible filter can last anywhere from 6 months to a year, depending on your usage and air quality conditions. Regularly checking the filter condition is essential to maintain optimal performance.
Can I use a HEPA-type filter instead of a True HEPA filter?
While HEPA-type filters can capture some particles, they do not meet the same efficiency standards as True HEPA filters. True HEPA filters can capture at least 99.97% of particles that are 0.3 microns in size, while HEPA-type filters may not be as effective. For optimal air quality, it’s recommended to choose True HEPA filters.
Conclusion
Maintaining your Philips air purifier doesn’t have to be a hassle. By understanding common issues, following troubleshooting steps, and considering cost-effective replacement options, you can ensure your home remains a sanctuary of clean air. Make informed decisions about your filter choices and enjoy the benefits of improved air quality and efficiency.


